Pages

Showing posts with label [Our] Place. Show all posts

Friday, 22 June 2018

Our Place; The Ensuite

Our brief for the en suite, and in fact the entire master suite, was to make it rival the best designed hotels we have stayed in. Maximum convenience and relaxation but with our own injection of style.


Render from 3D Model

Black brass ware adds an edge to the blush and marble hexagon tiles. Wet room layout has been designer to keep this small space feeling light and open.

The vanity has a decent length of clear top and storage to allow for products. We decided against dual sinks to keep a usable vanity area.

The heated towel rail will have a boost function to allow the towels to dry without the central heating being on.

The skylight will provide natural ventilation and much needed daylight in a space without any other windows. Mechanical extract fan will take moisture out of the bathroom.


1) There are a couple of options for the shower
If you want a hand held shower attachment Lusso Mia Shower at £495 is a great option- they also do round fittings

2) Amazing marble look porcelain tile in a range of sizes and shapes for Techtile London- but we are going for 200mm x 200mm Hexagon

3) Mosaic hexagon tile in a really beautiful blush from the Concept Three: Nordic range, also at Techtile London

4) Mode Spencer Towel Rail from Victoria Plum £49.99- Various sizes available and matching toilet roll holder and robe hooks available 

5) Mode Spencer mixer tap from Victoria Plum £89.99

6) Dniester 120cm Vanity unit from Wayfair £629.99

7) Maxheat matte black heated towel rail from Heat and Plumb various sizes and configurations from £64.95

Friday, 23 March 2018

Our Place: Planning the dream

Its been a long time in coming, almost five years with a leaky roof, a window that doesn't shut in the bathroom and no real shower. But we have broken ground and we are finally remodelling!

It's actually quite tricky designing for your own home, especially when both of you have strong opinions/ passions and particularly when one of you thinks he is 'The Client' with the final say... eh em... not naming any names.


Usually, when I go to a clients home for the first time, I have the advantage of fresh eyes and impartial perspective. However when you've lived in a place for a while I find you adapt to it and become blinded to its inefficiencies. 

So its challenging but also the best fun, so much freedom to play with concepts you'd loved but never been able to see in reality. We are on a budget so I am working hard at sourcing reasonable finishes and furniture and will be looking at ways we can facelift items that we already own. All of which I plan to share as we go...


For today I'm sharing our proposed floor plans and some of the mood boards (above) we are using as a starting point for sourcing.


The ground floor wrap around extension:

New garage and workshop
New utility with external and garage access
Extended kitchen and dining area
New corridor from the entrance to the back garden
Small extension to the front living room

First floor extended area: 44.5 m2


First Floor Extension:

New open plan study area to the first floor landing
New box room
New master suite with walk in wardrobe and ensuite
New family bathroom

First floor extended area: 34.5m2


Thursday, 8 March 2018

Our Place: The Planning Application Process

We have planning! 

It took a little while to achieve but we have it!

I’ve been through the planning process many times and thought I knew exactly how to get what we wanted. However every day is a school day, and there were some do’s and don’ts we learned along the way if you're planning a scheme that’s a bit more unusual:

Do give yourselves some room to negotiate

If you're pushing the limits of what you think is acceptable there is no harm in preparing yourself with some pre-assessed compromises. 

To get our scheme through we agreed to:
  • Change the cladding from the somewhat risqué black zinc to timber cladding
  • Remove our projecting balcony
  • Reduce our overhangs

Do go and talk to your neighbours

Ours were pretty unhappy and it was uncomfortable, but I think the relationship is still intact and we’ve actually gotten to know one side better. The other side not so much!

Do talk to your planner or have your architect talk to your planner

Despite initial reservations, we were able to convince our planner that the modern approach we were taking, at the rear of the property, was a more honest representation of the sustainable timber frame construction method we wanted to use.


Don’t be afraid to chase your planner

I was very keen to keep a good relationship with our planner and resisted chasing her before she went on holiday and as a result, we ended up having two extensions of time on the planning decision. Mistake!

Offer to compromise before you get formal feedback- the jury is out

The last do/ don’t is a bit tricky as I can’t tell if our process was slowed down or if it’s ultimately what got us through so I’ll just tell the story.

After the comments from our neighbours (some of which were quite damning and not representative of the discussions we had), I called the planners and offered to compromise the scheme if they could give us some formal feedback. 

We waited a long time for the feedback due to holidays and difficulty seeing our neighbours and this resulted in our planning decision being delayed by about 6 weeks, but ultimately due to our being willing to compromise we achieved planning first time with just a few tweaks to the dwgs....

Approved planning scheme from the front

Approved planning scheme from the rear


Sunday, 11 December 2016

[Your] Place: A winter update, That's not just for Christmas

It's officially winter here in Blighty; December is in full swing, festive lights are twinkling and the parties are in full swing.

So it seemed very timely to have been encouraged by Jordan at Douglas Elliman’s Florida office to write a blog post that would inspire people to cosy up their homes for the oncoming season.

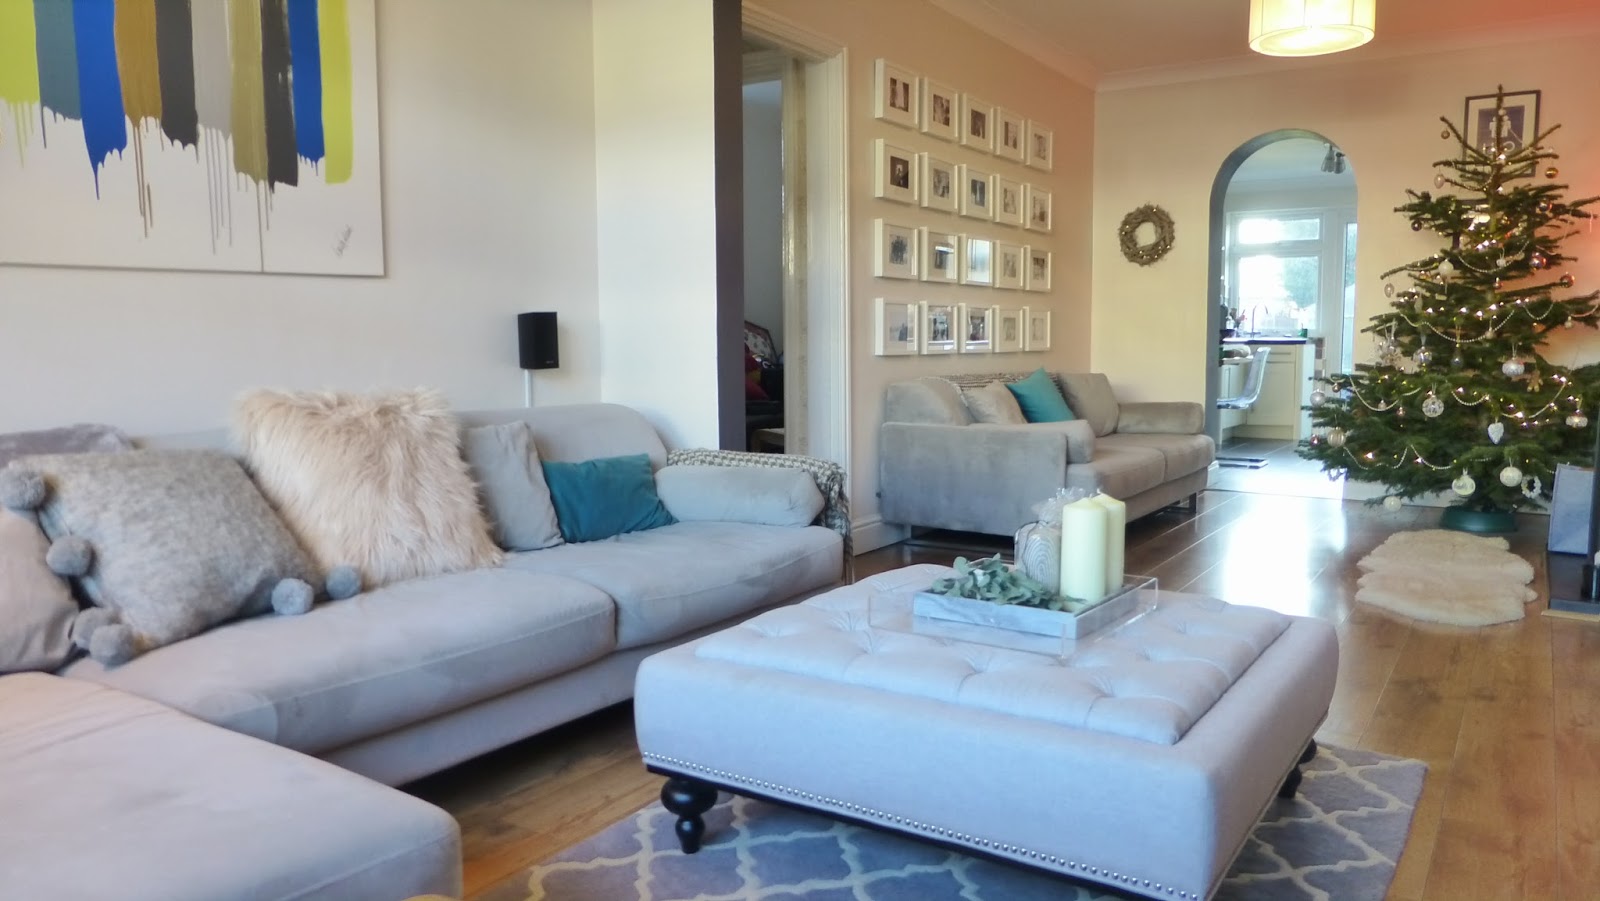
This post has been conjugating in my mind since we first decorated our lounge (you can see the original decor here) which has been designed with a neutral base to allow us to change it up seasonally. 

Many people decorate their homes exclusively for Christmas festivities, but I wanted to create a scheme with a big more longevity that celebrates the beauty of the winter season, lasts well beyond the month of December and could just as easily be implemented in warmer (than freezing) climates.

My first step is always a mood board, a collection of images, textures, materials and photographs that start to shape the feel of the scheme I want to create. Pintrest is such great platform for this. You can see the full board here [Your] Place: Winter Wonderland.

I wanted to create a relaxing colour scheme, inspired by the colours of winter. A palette which creates a feeling of cosy, refined opulence through the use of natural materials and variety in texture. 

I also wanted to bring some of the freshness of the outdoors inside, to create a connection bring in some of the evergreen life and beautiful muted blues and greens of Eucalyptus. 

So here are my easy updates...


1) Cushions & Textiles

One of the easiest updates, with the most impact, is to change the textiles.
When coming up with the original scheme for the lounge I kept the base monochrome and of colour limited to throw cushions and artwork for exactly this reason. 


I've kept our teal cushions but removed the mustard yellow and bright pink for the time being. I've introduced a more muted colour palette of pinks and greys, inspired by the mood board above, and introduced a wider range of texture to keep things interesting and feeling sumptuous. Choosing to mix up textures in a simple colourway really gives a lot of freedom to just pick up the things that appeal to you, without worrying about clashes or mismatches. 


2) Plants, flowers and greenery

There are many studies into the positive and uplifting effects that a connection with nature has on the human psyche. I used a lot of greenery in the scheme as a cost effective and sustainable way to resist the stuffiness that can come with winter. 

My home is full or succulents a year round, as they are easy to maintain (I've got previous as a plant killer), and come in a vast variety of shapes and colours. 


Introducing seasonal evergreens connects the existing succulent plants with the seasonal update and brings a fresh fragrance into the home. The use of similar evergreens in each space is a cost effective way to create a cohesive look throughout your home and a chance to get a bit creative. I used two bunches of Eucalyptus from our local flower market [£15] but you could just as easily go foraging in your garden. 


3) Accessories

I've introduced some marble accessories into the lounge area to build on the muted natural colour palette and texture. The coasters and tray were from Home Sense but I have found a similar tray and coasters from Olivia Bonas 


4) Lighting

Lighting is one of the most powerful tools to change the way a space feels. I'm a great believer in levels of lighting, table, floor lamps and candles are a permanent feature in our home. 


For the winter update I've used white, cream and grey candles in every room. I've also added a wooden garland with fairy lights in the lounge.

The antler candle holders on the mantle piece were from H&M last year but I found a similar Branch Candle Holder this year.

5) The Tree


Our tree is a mixture of metallics and white, every year I buy a new ornament (or two) this years additions was from our new John Lewis store, available here and from Olivia Bonas available here 


6) Table settings

Food and drink is a big focus of the festive period, and they say you eat with your eyes so the table setting deserves some good attention. 


Every year we lose at least a couple of glasses, due to my chaotic demeanour, so this year we recycled the odd ones and stocked up with cheap and (I think) stylishly cheerful glasses from Ikea, suitable for a range of cocktails. The tall tumblers are my particular favourite. The stopper bottles are to avoid that last minute 'who needs a drink?' as you're trying to get all the food to the table.


The washed linen table runner is from H&M which not only provides variety in texture but also protects the table from hot dishes. The paper napkins are also from Ikea and the napkin holder is from H&M

The total cost of the lounge update was around £155 and will (mostly) last well beyond Christmas. For me its about creating a home that you long to be in without breaking the bank.

Happy Holidays!


Tuesday, 1 April 2014

[Your] Place; The Finishing Touches

Getting the basics of your scheme right is important,
Sometimes a scheme concept can be a struggle to get right...

...but all that hard work will pay off when you add the finishing touches.

This is the fun bit- These pieces will really put your stamp on the your place, they'll have the most impact with instant effect and (with a little luck) bring everything together.

[Our] Lounge scheme (post coming soon]) has been developed as a neutral base with dark charcoal grey, creams and blacks. The prints and patterns we've selected  are very graphic and I've been letting it settle in my mind whilst looking for the right statement to set it off.

Sometimes you just can't rush to finish!

I recently painted a very simple canvas (project from the January Cure) that brings together my favorite shades and tones in a sort of graffiti mood board.

My colourful Graffiti Canvas

Its a large canvas and a strong statement that balances the monochrome patterns and metallic wallpaper and introduces another influence.

To pull this influence into the room I have been seeking some bright color block velvet cushions to complement the pale grey velvet fabric of the sofa.

I love velvet and suede; the intensity of the color is so much more lustrous and luxurious with a textured fabric finish.

After a long search I found some gorgeous cushions in by Soho at Heals, but at £45 a pop I couldn't bring myself to do it (especially as the Mr hates cushions).

Soho At Heal's

I am a firm believer in spending your money where it counts and in my mind that is investment pieces of furniture, I always try to keep spending on accessories minimal so a scheme can be easily updated without breaking the bank.

And that's how I came across H&M for Home cushion range and I just had to share...


The Colourways...


The cushion covers come in two sizes 50 x 50cm (£6.99) and 30 x 50cm (£4.99). H&M also sell the inner cushions at £6.99 and £4.99 respectively.

Its quite unusual to find such a board range of colors and sizes in a variety of fabrics I think H&M will be my go to for throw cushions from here on in.

I've put together some example colorways below to get the creative juices flowing!


 Post on completed Lounge scheme coming soon...